Recycled bread
|
Ingredients :
Rye flour, whole wheat, strong wheat flour, sourdough, water, salt, old light bread, honey, walnut oil Tool: Dough spatula, large container etc. two smaller electric bowl, slicing knife, mold or cast iron pan |
Time consumption: Day 1 morning. Sourdough is refreshed. Stale bread is soaked. 5 minutes Day 1 evening. Dough is mixed and folded. 3 hours Day 2 morning. Dough is shaped for 1 hour and rises for 7-9 hours. Day 2 evening. Bread is baked. approx. 1 hour |

There is a good, old tradition here in Denmark of using leftover "old" rye bread in the new rye bread dough. When I realized that in Germany there is a similar tradition of recycling leftovers in the equally traditional Landbrot – yes, there are even public directives about what percentage of the baker's bread dough must be recycled! – of course I had to try it out.
Where the tradition for recycled rye bread in this country is to tear the old bread into the dough, in Germany you cook a porridge on the leftover bread, i.e. a bit like you would make beer bread, before adding it. So in its essence this is quite similar to a porridge bread (see e.g. here or here ). It just tastes pretty much different. Because when sourdough bread ages - and obviously NOT in a plastic bag, but in a cloth or possibly a paper bag – the sourdough continues to work, so to speak. So sourdough bread left in the oven for a few days has a deeper flavor than completely freshly baked. I personally really like that, but of course it's a matter of taste. Well, this deeper sourdough and grain flavor carries over to the new dough, which is pretty wonderful if you ask me. Oh yes, and it is (still) a good way to use up the last leftover bread, so that you can throw yourself into a round of baking with a clear conscience, even if the previous loaf has not yet been eaten.
It is always a good idea to let freshly baked bread cool for an hour before cutting it: it will continue to bake and must be allowed to release some of the moisture. Otherwise, you run the risk of getting a bad case out of it, even if the baking was perfectly optimal and perfectly timed. This is even more important when there is porridge of some kind in it – so hold your horses ! It's worth the wait.
Bon appetit!
Tool:
Dough spatula, one large or two smaller containers with lids (or bowls and damp tea towels to put on top) for raising the dough, either molds or lined rising baskets for proofing, sharp knife or razor blade for scratching. If you want to bake free-standing bread, you must also use a cast iron pan.
Ingredients:
- 50 g rye flour
- 250 g whole wheat
- 700 g strong wheat flour, e.g. Type xx or Mariagertoba
- Approx. 200 g refreshed, merrily bubbling sourdough
- 600 g lukewarm water
- 26 g of salt
- Approx. 350 g cooled bread porridge consisting of approx. 100 g old bread - incl. crust! – cut into cubes and boiled for approx. 3 dl water (there will probably be a little left over)
- 1 tablespoon honey
- 1 tablespoon walnut oil
Day 1, morning:
- Refresh your sourdough by pouring out most of the sourdough starter (or into another container for later use) and adding a good ladle of lukewarm water and approx. as much wheat flour for the remaining residue; stir well. If you use completely light flour and make a firm mixture, the sourdough takes longer to mature than if you use whole grain.
- When the sourdough has approx. doubled its volume, it is ready for use. And if it manages to fall back together a little before you start baking, it's also perfectly fine.
- Cut the stale bread into cubes and soak it in the water (see under ingredients)
Day 1, afternoon/evening (when the sourdough is ready):
- The types of flour are mixed well in a large milk dish or similar, and water and sourdough are added and mixed to form an uneven porridge - make sure, however, that all the flour is wet. The amount of liquid is quite low here, and it makes for a fairly firm and slightly difficult dough to work with. But when the "bread dough" is added later, it is amply compensated for.
- Let the dough rest for approx. ½ hour – called autolysis: the flour absorbs the moisture and its gluten starts to work.
- Meanwhile, the bread porridge is being cooked - make sure to whisk it well so that it is as smooth as possible. Then set it aside to cool.
- The cooled porridge is mixed well with the salt, walnut oil and honey.
- Work the porridge mixture well into the dough - it's a real messy shop, but the dough should come together eventually.
- The dough rests, and approx. every half hour for the next few hours stretch and fold the dough by grabbing the side, stretching the dough and folding it over itself; rotate the bowl a quarter turn and repeat 4-5 times. The dough here is a bit sticky at first because of the porridge, so it will never be as smooth and elastic as the one in the course video (Folding and stretching the dough video below).
- After the series of foldings, the dough is refrigerated, either in one large container or in two smaller ones. If you are not used to handling these wet, light doughs, I would recommend that you share it already here. Because once the dough has risen, the whole exercise comes down to knocking as little air out of it as possible - and then it can be nice not to have to chop and cut it. A tip: make sure that the container(s) are completely clean and smooth, and then put quite a bit of water in the bottom. Then the dough will release more easily.
Day 2, morning:
- Carefully pour the dough onto the table and quickly and gently shape it into balls. Feel free to use the dough spatula to keep the dough clear of the table, it can stick a bit here. Don't be tempted to pour a lot of flour on the dough, but instead rinse your hands and the dough spatula in cold water. Feel free to check out Michael's video below, he demonstrates the technique really well. (Video: The dough is formed into a ball)
- After a rest of 15-20 min. the loaves can be tightened once more. For mold bread, they just get another turn as above; for free-standing bread, shape them as in course video no. 2. (Video: Envelope method)
- Place them seam side down in the two molds or upwards in the rising baskets.
- Cover with tea towels and refrigerate.
- When the loaves have risen so that they just arch over the edge of the tin, they are ready to bake. It takes 7-9 hours. Alternatively, you can leave them to rise on the kitchen table, then of course it will be stronger. Be aware that bread in the form is more forgiving than in the proofing basket: they can withstand a little over-rising, whereas bread that is to be turned out and baked free-standing can easily collapse if they have risen for too long. So keep an eye out!
Day 2, afternoon/evening
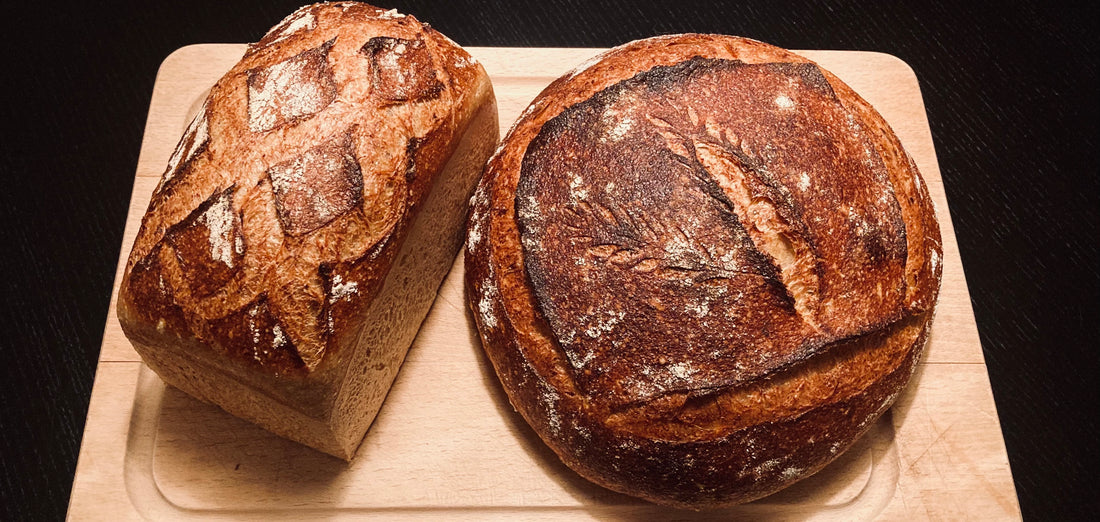
Free-standing bread is baked in a cast iron pan:
- Put the pan in the oven and heat it up to maximum, preferably at least 250 degrees.
- Turn one of the loaves out onto a piece of baking paper, lift into the pan, cut the surface with a razor blade or a sharp knife and put the lid on, and let it bake for 20 minutes.
- Turn the heat down to 220 degrees, take the lid off the pan and let the bread finish baking until it sounds hollow when you knock on the bottom. It takes approx. 30-35 min., depending on the nature of the oven.
- Remember to heat the oven up to max again before baking bread number two.
Bread that is baked in a mold is simply placed in the oven without any additional frills, except for a little water:
- Heat the oven to 220 degrees, cut if necessary. the loaves and put them in the middle of the oven; throw a cup of water into the bottom of the oven to create some steam.
- The loaves must first bake for 40 minutes in the molds; then turn them inside out and continue baking for approx. 10 minutes. Here it is really a good idea to check the core temperature: it should rise and kiss the 95-98 degrees to ensure that the crumb does not become sticky due to the porridge.
The dough is folded and stretched (Extracts from Rugkop's online baking course )
Video: Dough is shaped into a ball (Excerpt from Rugkop's online baking course )
The envelope method: The dough is shaped like an envelope (Excerpt from Rugkop's online baking course )
Anyone can learn to bake light sourdough bread. Buy our online course and have flour and equipment delivered to the door.