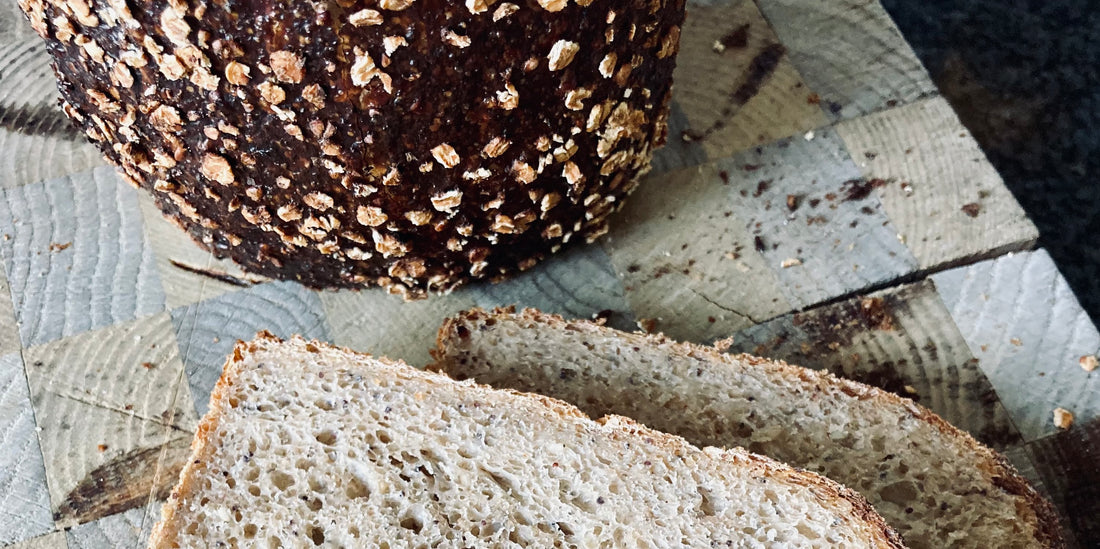
Molded bread with oatmeal, buttermilk and sesame
|
Ingredients : Whole wheat flour, spelt, emmer, einkorn or durum, stone-ground wheat flour, baking-strength wheat flour (e.g. type xx), sourdough, buttermilk, water, salt, oatmeal, birch, sesame seeds, sesame oil etc. butter, honey etc. syrup. . Tool: Dough spatula, container with lid or bowl, two small molds of 1.7 l each, possibly a frying thermometer |
Time consumption: Day 1 morning. Sourdough is refreshed. 5 minutes Day 1 afternoon. Dough is mixed and folded. 3 hours Day 2 morning. Bread is shaped. 30 minutes Day 2 evening. Bread is baked. 50 minutes |

This bread is a collection of recipes and ideas gathered from different places. And it is the consequence that I am crazy about oatmeal in the bread but less enthusiastic about folding the porridge into the half-raised dough according to the Tartine method (you can read in detail about this in Chad Robertson's wonderful book More of the good bread ). So, I'm absolutely sure that when you master the method, you'll be rewarded with a juicy case with big, nice holes and all. But it's just difficult to get it to be really good, because the porridge wants to work its way out of the dough, and it's a hassle to handle.
So I started squeezing the porridge into the dough along with the salt right after the autolyse (the first resting period) and found that it actually worked just fine. It requires flour of seriously good quality, and here it really makes sense to use some very strong wheat flour, e.g. Manitoba, Kragegaardens Type xx or Kornbymølle no. 1. You simply need some gluten flour to lift the heavy porridge.
Well, you can easily do that for bread baked free-standing in a cast iron pan or on baking steel. But then the summer heat came and made trouble. And with a move on top of that, I was pretty sure it was going to go wrong. So I tested it: I proofed half of my dough as usual in a basket, and the other in a mold. One splashed out like a jellyfish, the other arched beautifully and dark golden – and tasted heavenly. I repeated the exercise a few times with a few changes along the way, and the recipe here is probably the best of the versions.
The good thing about baking in shape is that you don't have to turn the raised, blistered dough out of a proofing basket and ease it into a pan. It is often here that the air is knocked out and the previously beautifully domed dough turns into a pancake.
Don't be put off by the many ingredients – drop sesame, birch and oil if you don't have them; use water if you don't have buttermilk, and skip the shaping if you don't have time or the guts. The most important thing is to let the first rise be cold, then it is easier to control and the cold dough is easier to handle.
Bon appetit!
Tool:
Dough spatula, one large or two smaller containers with lids (or bowls and damp tea towels to put on top) for raising the dough, two small molds of 1.7 l and possibly a frying thermometer
Ingredients:
- 250 g wholemeal flour (wheat, spelt, emmer, einkorn, durum – or a wonderful mixture)
- 400 g stone-ground wheat
- 350 g strong wheat flour, e.g. Type xx
- Approx. 150 g refreshed, merrily bubbling sourdough
- 500 g cold buttermilk*
- 200 g warm water
- 25 g of salt
- Approx. 250 g cooled oatmeal
- 20 g of birch
- 50 g sesame
- 1 tablespoon sesame oil or melted butter
- A few tablespoons of honey or syrup
Day 1, morning : refresh your sourdough**
Day 1, afternoon/evening (when the sourdough is ready):
- The types of flour are mixed well in a large milk dish or similar, and buttermilk, water and sourdough are added and mixed to form an uneven porridge - make sure, however, that all the flour is wet.
- Let the dough rest for approx. ½ hour – called autolysis: the flour absorbs the moisture and its gluten starts to work.
- In the meantime, cook the oatmeal and set it aside to cool (if you, like me, have rolls who consume fluctuating amounts of oatmeal for breakfast, you can advantageously collect the casserole leftovers over a few days - the porridge keeps well in the fridge).
- The cooled porridge is mixed well with the salt, birch, sesame seeds, sesame oil (or butter) and honey.
- Work the porridge mixture well into the dough - it's a real messy shop, but the dough should come together eventually.
- The dough rests, and approx. every half hour for the next few hours stretch and fold the dough by grabbing the side, stretching the dough and folding it over itself; rotate the bowl a quarter turn and repeat 4-5 times. The dough here is a bit sticky at first because of the porridge, so it will never be as smooth and elastic as the one in the course video. But it doesn't matter, because the loaf tin will do its magic for you.
- After the series of foldings, the dough is refrigerated, either in one large container or in two smaller ones. If you are not used to handling these wet, light doughs, I would recommend that you share it already here. Because once the dough has risen, the whole exercise comes down to knocking as little air out of it as possible - and then it can be nice not to have to chop and cut it. A tip: make sure that the container(s) are completely clean and smooth, and then put quite a bit of water in the bottom. Then the dough will release more easily.
Day 2, morning:
- Carefully pour the dough onto the table and quickly and gently shape it into balls. Feel free to use the dough spatula to keep the dough clear of the table, it can stick a bit here. Don't be tempted to pour a lot of flour on the dough, but instead rinse your hands and the dough spatula in cold water. Feel free to check out Michael's video below, he demonstrates the technique really well.
- After a rest of 15-20 min. the loaves can be tightened once more. Either they just get another turn as above, or you can shape them as if it were for free-standing baking (see course video no. 2).
- Turn them into oat flakes and place them with the smooth side up in the two moulds.
- Cover the molds with wet tea towels and refrigerate.
- When the loaves have risen so that they just arch over the edge of the tin, they are ready to bake. It takes 8-9 hours. Alternatively, you can leave them to rise on the kitchen table, then it will be somewhat stronger, especially here in the summer heat.
Day 2, afternoon/evening
- Heat the oven to 220 degrees, put the loaves in and throw a cup of water into the bottom of the oven to create some steam.
- The loaves must first bake for 40 minutes in the molds; then turn them inside out and continue baking for approx. 10 minutes. Here it is really a good idea to check the core temperature: it should rise and kiss the 95-98 degrees to ensure that the crumb does not become sticky due to the porridge.
- Allow the loaves to cool completely (if you can!) and enjoy them just the way you like them best. But then, they work great on toast, I'm just saying!
* The buttermilk can easily be replaced by water. But if you now have a touch, it really gives a delicious texture to the crumb, and it adds an extra sourness, which I really love. In addition, together with the oil/butter, it makes the crust finer and crispier. Together with the sweetness from the oats and honey, the result is something close to a luxury toast.
**I have experimented a bit with adding cocoa to the sourdough when I freshen it up for these tins. It's not something I came up with myself, but is a recipe taken from Vanessa Kimbell's unrivaled and wildly inspiring book The Sourdough School . Or recipe and recipe... I'm not very precise when it comes to the sourdough refresher. So it's mostly something to replace part of the flour with good cocoa when I freshen up the sourdough. It's quite a delicious sensation to pour something resembling chocolate mousse into your bread mix. And then it adds a beautiful color and a flavor complexity to the finished bread, which goes well with oats and sesame. But it doesn't taste like chocolate. Think of it a bit like when you put a bit of dark chocolate in your chili con carne. It becomes a spice on par with the others.
The dough is folded and stretched (Extracts from Rugkop's online baking course )
Dough is shaped into a ball (Excerpt from Rugkop's online baking course )
Anyone can learn to bake light sourdough bread. Buy our online course and have flour and equipment delivered to the door.