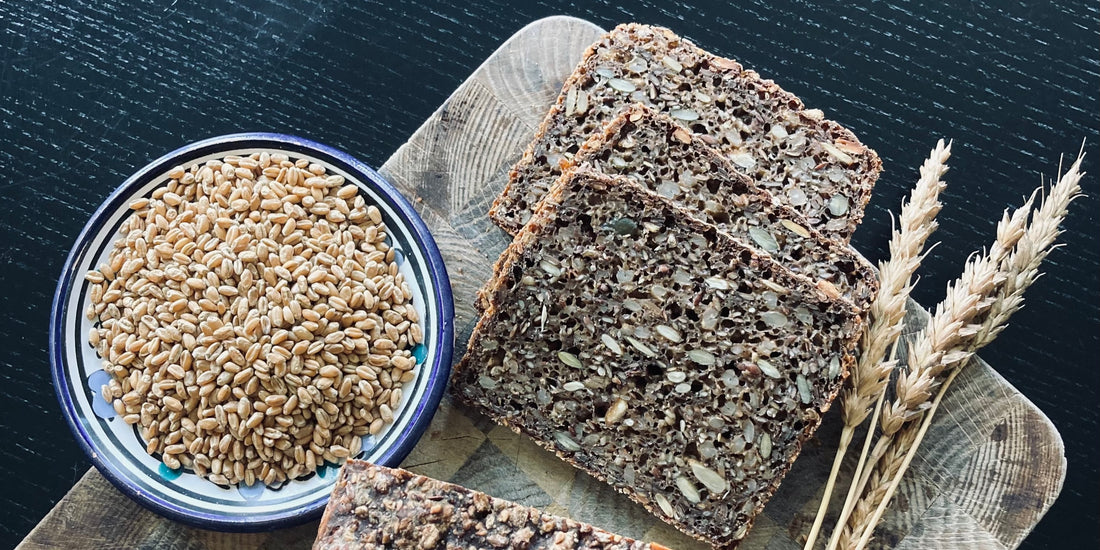
Rye bread without rye
|
Ingredients : Wholemeal flour from einkorn, spelled or emmer, stone-milled sifted wheat or spelt, cracked kernels from einkorn, spelled or emmer (or rye!), dark malt flour, sourdough, buttermilk, dark beer, water, honey etc. syrup, salt, linseed, mixed seeds, whole kernels island wheat, spelt, einkorn etc. barley. Tool: A large bowl for raising the dough, two small 1.8 l molds and a frying thermometer |
Time consumption: Day 1 evening. Sourdough is refreshed. Whole kernels are boiled for 20 min Day 2 morning. Dough is mixed. 2 hours Day 2 evening morning. Bread is baked. 75 min. |

Ceci n'est un rye bread.
If you haven't been fed small square hapsers with liver and bacon since you could chew, then I have to say hello and say that a good old-fashioned rye bread can be good for a delicate digestive system.
In France, it is completely normal to talk about your digestion, and you can safely count on getting an attentive audience if you start spreading the word about various problems with getting one or the other type of food processed through the system without be inflated. Then will invariably follow a string of interested, probing questions and good advice. Of course, one does not talk about the final result of the digestion itself. But the internal relationships , so to speak, are absolutely a legitimate and socially acceptable topic of conversation.
Thus, my grandmother's biggest concern when we moved to my mother's home country of Denmark was HOW WE WOULD GET SOMETHING PROPER TO EAT?! She had heard that children were given packed lunches to school – meaning no serious, hot meal in the middle of the day. And worse still: the packed lunches consisted of an indigestible stone bread with pieces of pork on it. Her beloved grandson would be upset, there was no doubt about that...
And true enough: I have never managed to get completely hooked on the Danish national dish. I can manage one or two discs a week. Max!
So here comes my interpretation of the "stone bread", strongly inspired by Chad Robertson's barley bread in Mere af det gode brod and by my friend's proven and really good recipe for a rye bread.
But then, if you don't have these kinds of problems, you can just replace some of the kernels or the flour with rye - it also works perfectly well.
Bon appetit!
Tool:
A large bowl for raising the dough, two small 1.8 l molds and a frying thermometer
Ingredients:
- 100 g wholemeal flour from einkorn, spelled or emmer
- 400 g stone-ground sifted wheat or spelt
- 100 g cracked kernels of einkorn, spelled or emmer (or rye!)
- 1 tablespoon dark malt flour
- Approx. 250 g refreshed, merrily bubbling sourdough (see below)
- 200 g buttermilk
- 100 g dark beer
- 450 g lukewarm water
- 20 g honey or syrup
- 15 g of salt
- 200 g linseed
- 200g mixed other seeds and kernels (I like to use something like 100g sesame, 50g sunflower seeds and 50g pumpkin seeds or chopped almonds – and if I have, I add an extra approx. 20g birch because they pop so nicely between the teeth)
- 400 g of cooked whole grains, e.g. island wheat, spelt, einkorn or barley - this takes approx. 2 dl kernels and 4 dl water and a sprinkle of salt
Day 1, evening:
- Refresh your sourdough by taking a small blob of the "old" sourdough and stirring it up with approx. equal parts cool water and light flour - I like to use stone ground, sifted wheat or spelt. It gives the sourdough a bit more to work with than all-white, strong flour, but is easier to control than a refresher on wholemeal flour. Leave the mixture on the kitchen counter with the lid on tightly so that air gets to it.
- Boil the whole kernels and let them simmer covered for 20 minutes. Then turn off the flame, place a cloth over the pan, and let the kernels soak in the water overnight. Then they are ready and very delicious the next morning – tender but anything but exhausted. *
Day 2, morning:
- Stir the wet ingredients and the sourdough together.
- Then you add the flour (incl. malt flour) and the broken kernels and stir well. It can be difficult as the mixture is very wet, so give it some love.
- Let the mixture rest for a good half an hour before mixing all the other ingredients thoroughly into the dough.
- Let the dough rest for another hour, and then divide it into the two molds. Make sure to press the dough down well, finally smooth the surface with a little water and cover them with a dry tea towel.
- From here, there are two options: either you can leave the loaves warm and bake them in the evening, or you can leave them warm for a good hour and then put them in the fridge until the next day. Both parts give an excellent result, so it is solely a question of what fits best into one's daily rhythm. Oh yes, and then the breads become a bit more sour and (even) easier to digest from a long, cold rise.
- The loaves should rise approx. to the edge, so if you refrigerate them and find the next morning that they have not moved enough, you must take them out and leave them on the kitchen counter until they have risen sufficiently.
Day 2 evening or day 3 morning/morning:
- Heat the oven to 200 degrees and put the loaves in.
- The bread must first be baked for approx. 1 hour in the molds; then turn them inside out and bake for approx. 15 minutes. Here it is a really good idea to check the core temperature: it should rise and kiss the 98-100 degrees to ensure that the crumb does not become sticky due to the many cores.**
- Leave the loaves to cool on a wire rack, wrap them in a tea towel and let them rise until the next day (or at least overnight if they are baked in the morning) before slicing.
*If you forget this, but are lucky enough to have pearled spelled or barley in the cupboard, you can cook these early the next morning. They are ready in just half an hour and can just cool down before you have to use them in the dough.
**Here you need to know your oven and your molds: if you use slightly longer and narrower molds than mine (which are from Art and kitchenware, bought in Rugkop's shop), the baking time may have to be shortened a little. So keep an eye out after approx. 45 minutes baking time and adjust afterwards.