Pain de campagne with spelled and rye
|
Ingredients: Wholemeal spelled, coarsely ground rye flour, stone-ground wheat flour, finely sifted wheat, light sourdough, salt, water and honey. Tool: Dough spatula, two rising baskets, tea towel, carving knife and cast iron pot with flat lid. |
Day 1: Sourdough refreshed (2 min) Day 2: The dough is mixed and folded (3 hours) Day 3: Bread is shaped, proofed and baked (3 hours) |
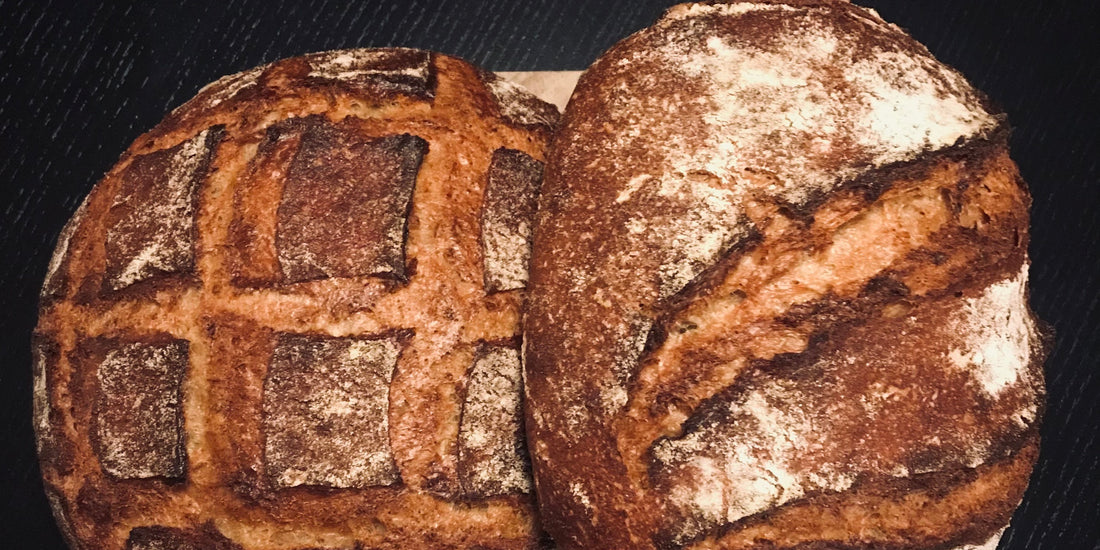
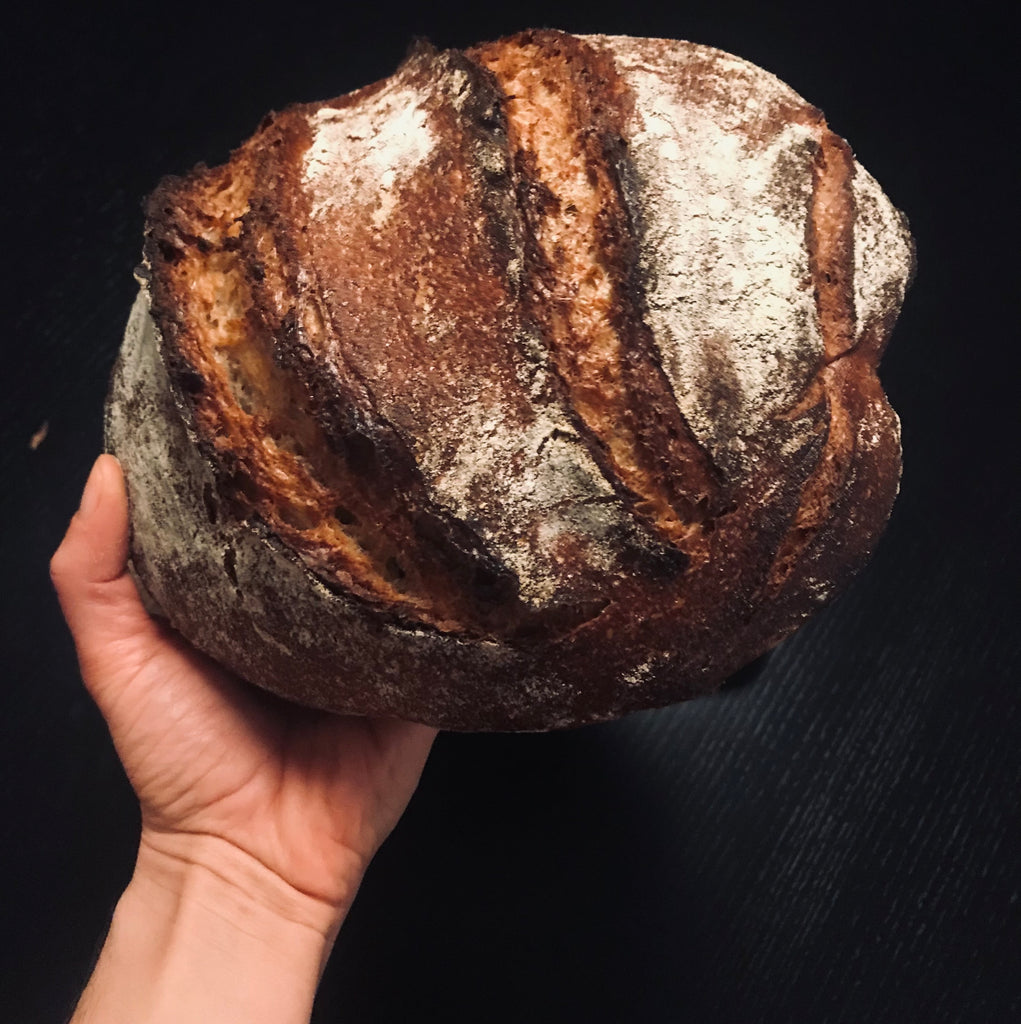
The traditional French country bread is probably the type I like the most, with a fairly dense and slightly sour crumb and a thick, crunchy crust. Originally, the loaves, called pain de ménage ("household bread"), were huge - we're talking 5-6 kg! –, quite flat and baked on even very coarsely ground flour. According to certain sources, it is actually doubtful whether they were even as wonderfully juicy and delicious as they have since gained a reputation for with the forgiving glow of nostalgia. Bread was the basis. It had to ensure that you could keep up with the heavy, tedious work for many, many hours. And it had to be cheap. Be that as it may, and regardless of the time's perhaps problematic yearning for authenticity and "the real", what is today called pain de campagne is simply one of the most delightful things I can think of, second only to the smell of a newborn baby.
With this recipe (which isn't rocket science; many have definitely, definitely made something similar!) I'm starting to approach what my parents served in thick slices alongside various rustic stews and other serious food in my childhood. And no, they didn't bake it themselves. Because there was no one at their full five who did that when you could go to the market or to the baker after that! And this is still the case for the vast majority of the French population: bread, it is a serious matter that must be left to the professionals.
Well, I can't really take care of that, so here comes a recipe. Bon appetit!
Tool:
Dough spatula, two rising baskets, sharp knife or razor blade and cast iron pan
Ingredients:
150 g wholemeal spelled
150 g coarsely ground rye (Kragegården's is almost a cross between cracked and ground rye, and it gives just the right bite)
400 g stone-ground wheat
300 g strong wheat flour, e.g. Kornby Mølle no. 1
Approx. 150 g refreshed, merrily bubbling sourdough*
700 g water + 50-100 g water together with the salt
25 g of salt
A few tbsp. honey
Day 1 , morning: refresh your sourdough
Day 2 , afternoon/evening:
- The types of flour are mixed well in a large milk dish or similar, and water and sourdough are added and mixed to form an uneven porridge - make sure, however, that all the flour is wet.
- Let the dough rest for approx. ½ hour - called "autolysis": the flour absorbs water and its gluten begins to work.
- The salt and the last water are added and worked well into the dough.
- The dough rests, and approx. every half hour for the next few hours stretch and fold the dough by grabbing the side, stretching the dough and folding it over itself; rotate the bowl a quarter turn and repeat 4-5 times. The first few times you can be a little energetic, but as the dough starts to rise, you have to be more careful not to knock the air out of the dough. This dough should preferably not rise too much to begin with, so I suggest putting the dough in the fridge as soon as it starts to show activity (typically after about 1 hour). Then it has to go in and out of the cooler a few times to get its stretch-and-bend exercise. Alternatively, you can simply knead it well after the auto light and put it in the fridge to rise without any further frills. You just have to be a little careful: spelled does not like to be over-kneaded, then it loses its springiness and becomes dry.
Day 3 , afternoon/evening**:
- Take the dough out of the fridge 2-5 hours before you want to bake it. When you take it in, you can take off a small lump, shape it into a ball and put it in a glass of water. When it floats to the surface, the dough has risen (and maybe needs a little help along the way: it can occasionally stick to the bottom of the glass, so I usually poke it a little when impatience starts to kick in).
- Carefully pour the dough out onto the table and divide it in half; and quickly and gently shape them into balls. Feel free to use the dough spatula to keep the dough clear of the table, it can stick a bit here. After a rest of 15-20 min. the loaves can now take their final shape: oblong or round to taste. Place them seam side up in floured proofing baskets and put them in the fridge to proof.
- The loaves should not rise for too long: typically an hour or two in the fridge. When you stick a floured finger a cm into the dough, it should still be able to level out the hole almost again, so that there is only just a mark left on the surface.
- While the dough is rising, place a cast iron pan in the oven, which is heated to approx. 250 degrees.
- Turn a loaf of bread out into the pan's lid if it is flat/without a knob on top - otherwise you can turn the bread out onto a piece of baking paper and lift the bread into the pan by holding a few pieces of the paper.
- Cut the bread with a sharp knife or razor blade and put the lid on.
- The bread must first be baked with the lid on for 20 minutes. at 250 degrees and without a lid for 30-35 min. at 220 degrees. Remember to heat up the oven again before putting bread no. 2 in.
*If you use completely freshly ground flour and would like a fairly sour bread, you must reduce the amount of sourdough slightly, for example to 100 g. It depends on how active it is. The cold, long rising increases the amount of the otherwise reviled acetic acid bacteria, which give a slightly sharp edge to the sourdough taste. It was precisely this that I wanted to bring out in this bread. But completely freshly ground flour is extremely active, so with the combination of a relatively large amount of sourdough, freshly ground flour and a long rising time, you run the risk of the dough rising. It's a delicate balance, and there's nothing else to do but try your hand at J
** In principle, you can start shaping and proofing the loaves already after 12 hours. But if you want more acidity and the deep taste of rye - and if your daily rhythm and patience allow it! - you should preferably wait 24 hours, preferably a little more.
How to fold the dough (Excerpt from Rugkop's online baking course )
Anyone can learn to bake light sourdough bread. Try our online course and get flour and equipment delivered to your door. Both for beginners and experienced.