Bread for delicate stomachs

|
Ingredients: Whole grain spelled, stone ground, sifted spelled flour, light sourdough, salt, water, honey/malt syrup Tool: Dough spatula, two lined proofing baskets with tea towels, sharp knife or razor blade and cast iron pan. |
Day 1 morning: Sourdough refreshed (2 min) Day 1 evening: The dough is mixed and folded (2 hours) Day 2 morning: The bread is baked (45 min) |
A friend asked me the other day if I had a recipe for a sourdough bread made entirely of spelled, which is the only thing she and her little family's delicate stomachs can tolerate. To that I replied that I wanted to try it, but that spelled is rather difficult to bake with clean if it is to be a free-standing bread. It is extremely rich in protein and forms some very long, delicious gluten threads. But unlike the gluten webs of modern wheat varieties (i.e. the wheat varieties that are sold under the collective name wheat, and which have been bred to perform at their maximum in the field and be very strong during baking), they do not contract again like an elastic band. And this is exactly what gives the dough strength and can hold some air during the rising. The spelled dough therefore easily becomes soft, flat and runny. And it does that especially if you knead it a lot and let it rise for a long time. And then comes the question: what is "much" and "long" in this context?
As far as kneading goes, I'd say: zero machines; use your hands. In the experiment here, I actually didn't knead the dough at all, and it got almost no stretch-and-fold series either, which is otherwise a good and gentle method. Just as I also didn't give it the whole trip with first and second lift. In other words: I simply tampered with the dough as little as possible. And as for the proofing, I tried a single, cold proofing overnight – but a short night! The dough went into the fridge at 11pm and it was in the oven at 6:30am the next morning (meaning I was up at 5:30am to heat up the oven and baking pan…). The reason why spelled dough should not rise for too long is that the very weak gluten is quickly broken down by the acid from the sourdough – which in turn helps to make the dough soft and ultimately gives a flat bread. That's why I also used a little less sourdough than I usually do.
But all that hassle with loose gluten, and what do I know, also makes the grain easy to digest. And I'll bet my old potholders that most self-proclaimed gluten allergy sufferers will be able to tolerate it. The code word is tenderness. And you can transfer that to many of life's relationships, if you were to get into the pocket philosophy corner. Bon appetit!
Tool:
Dough spatula, two rising baskets lined with tea towels, sharp knife or razor blade and cast iron pan
Ingredients:
250 g wholemeal spelled
750 g stone-ground, sifted spelled flour (i.e. only the coarse bran is sifted)
Approx. 125 g refreshed sourdough
700 g water + approx. 50 g of water together with the salt
23 g of salt
1 tablespoon malt syrup or honey
Rice flour for dusting the tea towels
Day 1, morning: refresh your sourdough*
Day 1, late evening:
- The types of flour are mixed well in a large milk dish or similar, and water and sourdough are added and stirred to form an uneven porridge - make sure, however, that all the flour is wet.
- Let the dough rest for approx. ½ hour.
- Salt, syrup and the last water are added and worked well into the dough.
- The dough rests again for half an hour and is then given a single series of stretches and folds: carefully pull up one side of the dough and fold it over itself; repeat 5-6 times.
- Let the dough rest again for approx. half an hour.
- Divide the dough in half, shape them into balls and let them rest for approx. 10 minutes (see the video Dough is formed into a ball below).
- Form the two balls into bread by turning them over so that the bottom side is facing up and folding the dough over itself until you feel it is springy (see the video Dough is formed into an envelope below). Turn them over and let them rest seam side down for 5 minutes to seal. Then place the two balls of dough in the rising baskets with the seam upwards, and put them in the fridge. You don't need to cover them: then they will stand and form a little crust, which helps to hold the dough together.
Day 2, early morning:
- Put a cast iron pan in the oven and let it heat up to approx. 250 degrees for a short hour.
- Turn a loaf of bread out into the pan's lid if it is flat/without a knob on top - otherwise you can turn the bread out onto a piece of baking paper and lift the bread into the pan by holding a few pieces of the paper.
- Lightly score the bread with a sharp knife or razor blade** and put the lid on.
- The bread must first be baked with the lid on for 20 minutes. at 250 degrees and then uncovered for 25 min. at 220 degrees. Remember to heat up the oven again before putting bread no. 2 in.
*If you are new to sourdough baking, I would suggest that you shift the process so that you freshen up the sourdough in the evening and break up the bread in the morning. Then you can follow the rise of the dough during the day and manage to "catch" it before it rises (yes, that requires you to be at home during the day). It must not start to become flat at the top but must be nicely arched all the way through the rise. Maybe you miss the first or second time - but then you know what to go for the third time.
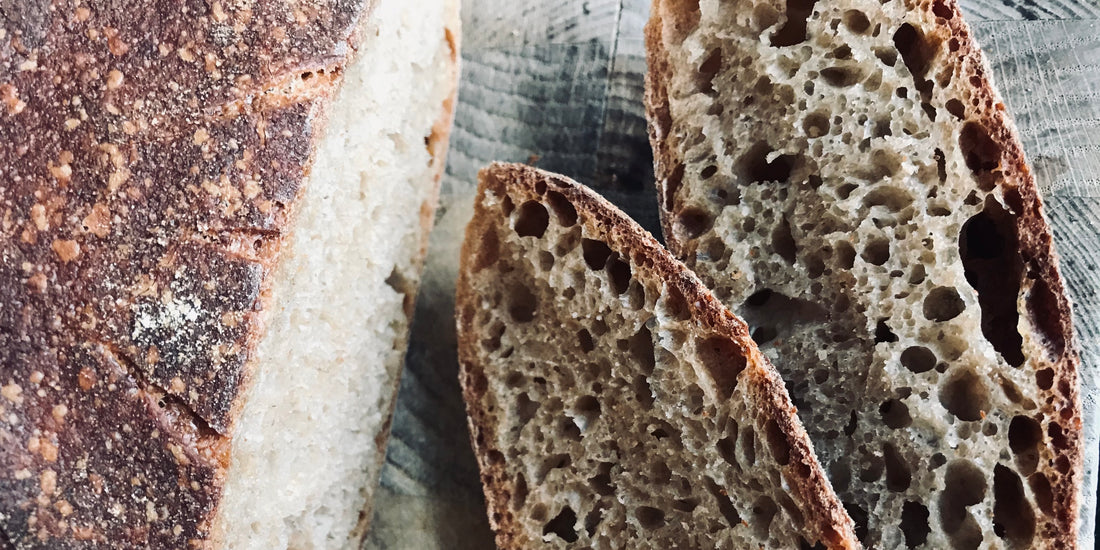
**The thing about slicing or scratching the bread is a whole science that I can't really plumb the depths of. You have to know your dough well to know exactly how deep and how much to cut it. I often fall short here, I must confess. Likewise this time too, at least with the first loaf, where I was excited that the bread didn't actually splat into a jellyfish when I turned it over in the pan, cut a big cross in it - and practically sawed after the places where the cut had not gone properly through the thin shell of slightly dried out dough. Result: the dough lost its breath and flattened out. The second time it went better: I scored more than cut a few curves and then left it up to the dough itself what it wanted to do with the rest. The result was a somewhat taller loaf!
Video: Dough is shaped into a ball (Excerpt from Rugkop's online baking course )
Video Dough is shaped like an envelope (Excerpt from Rugkop's online baking course )
Anyone can learn to bake light sourdough bread. Buy our online course and get flour and equipment delivered to your door.